
Live and learn... and sometimes you gotta improvise...
I wrestled with the 6 coolant hose clamps under the gas tank and I finally got them all tightened. Ironically, I didn't see any evidence that coolant was leaking from any of these clamps, but I tightened them a bit anyway, being conscious not to over tighten them, which could be worse than them being loose. It's a tricky job, but it can be done.
I didn't want to loosen the clamps and spin them like Fred did... I figured if I could get to them to loosen them, I might as well tighten them on the spot and not have to worry about the clamps rubbing other stuff. I read a post this morning by Blind Yak, and he did the same thing I did for the most part:
![Image]()
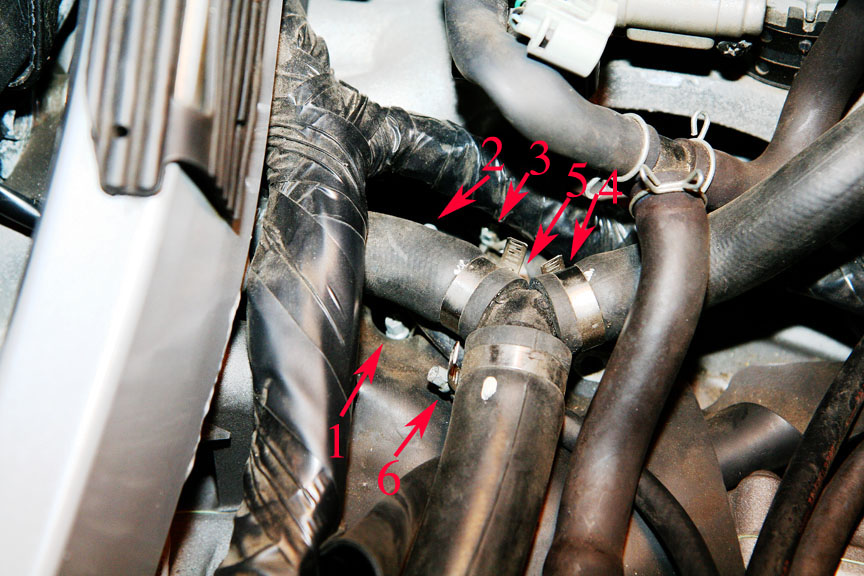
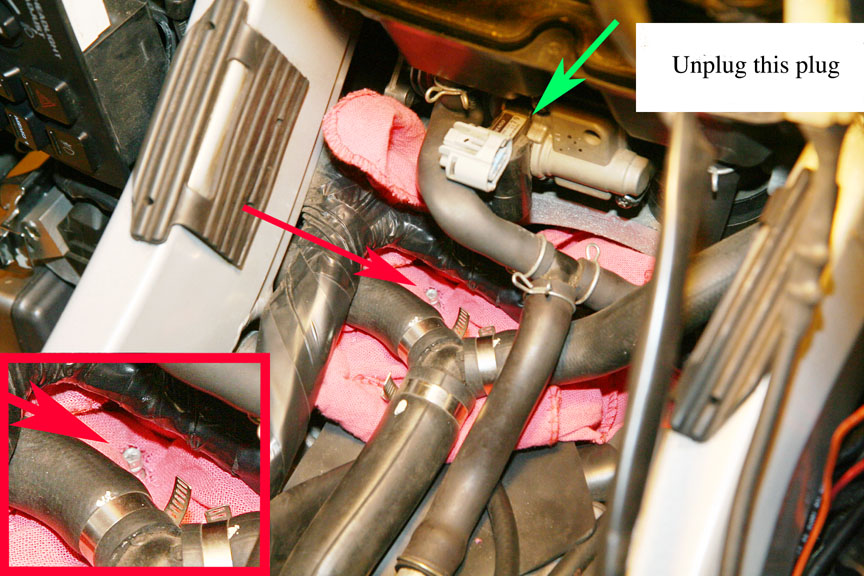
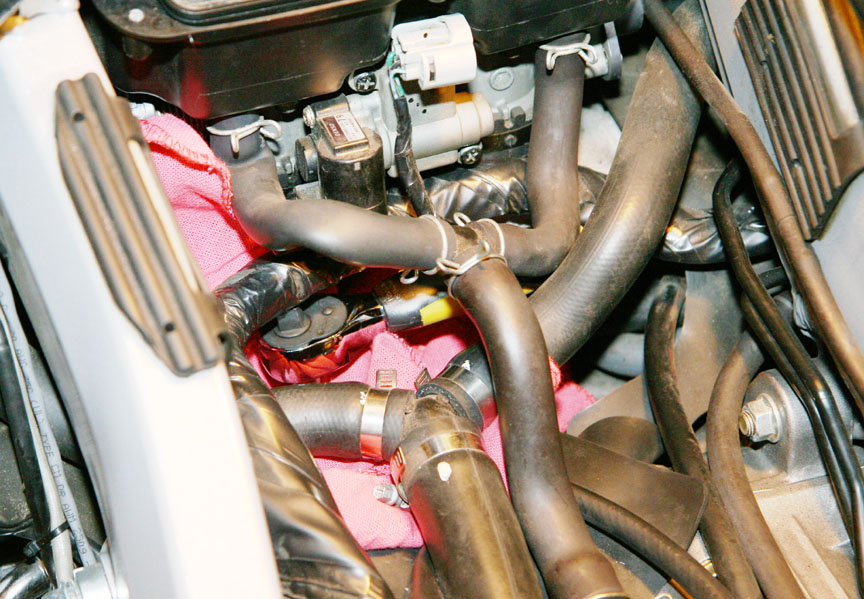
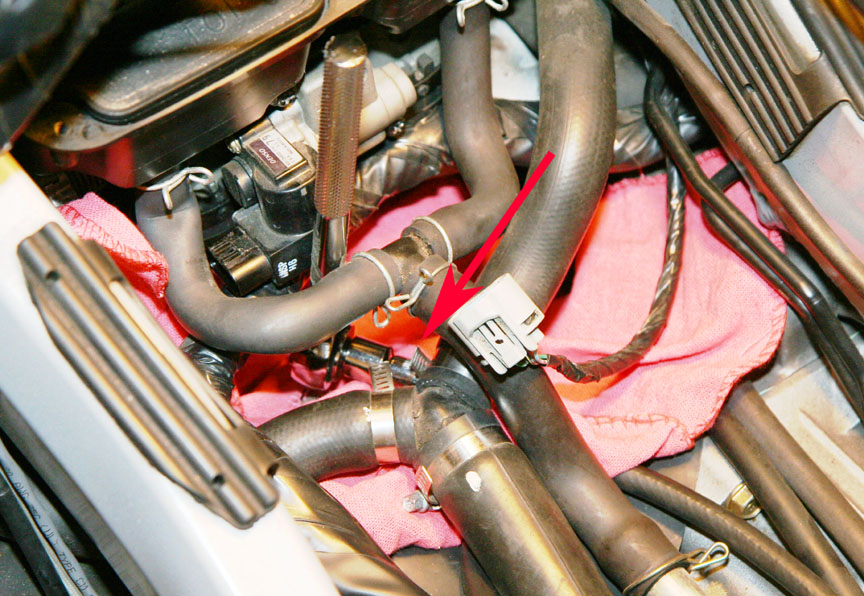
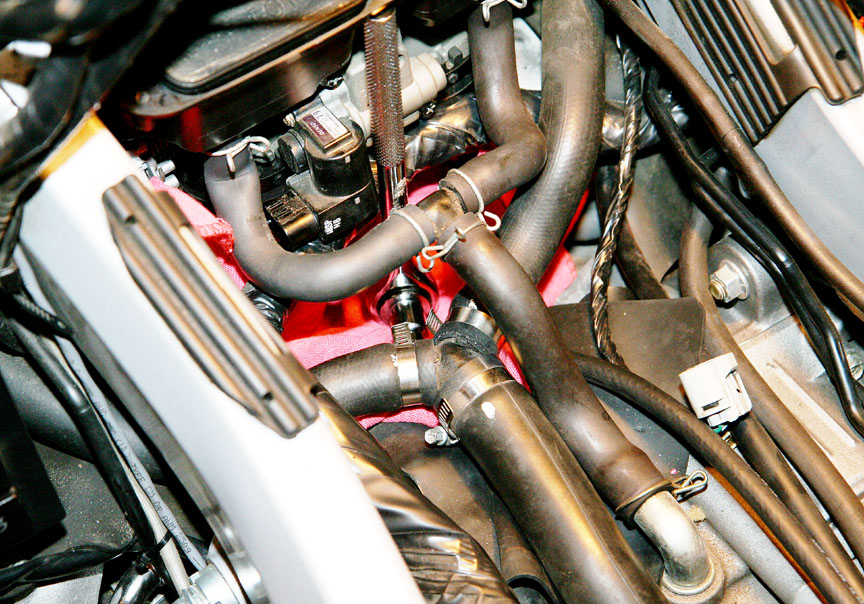
And here's the hose clamps. I numbered them in the order I did them and for purposes of these photos.
![Image]()
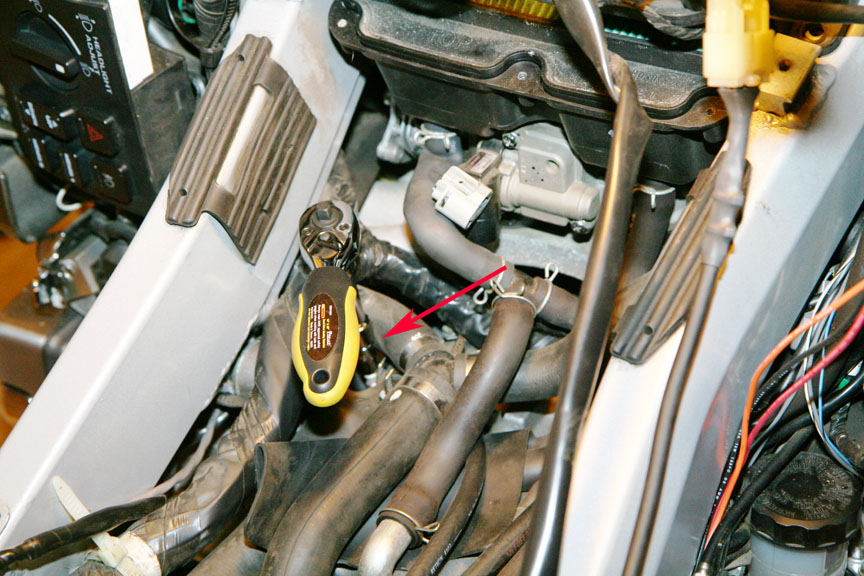
Here's photo's of tightening each clamp so you can see the orientation of the wrench in that tight space. I disconnected a plug that's in there so I could get more "swing" on my ratchet. I don't know what the plug is for, but you'll see it in the pics.
The real secret behind this job is "manhandling" the hoses. I found that as they warmed up from me fighting with them for a while that they became more flexible. Don't be afraind to bend them and push them out of your way to get your wrench on the nuts. There's a thick wire harness in there too that you have to move around.
Clamp 1 - This one is easy:
![Image]()
Clamp 2 - For this one I had to jam my stubby ratchet in under some hoses, and I didn't want the socket or socket extender to drop off into the black hole, so I worked a shop rag in there. Then you can "feel" where the clamp nut is, and I grabbed the rag at the nut with a pair of needle nose pliars and cut a small hole in the rag with scissors. I then exposed the nut through the hole and felt alot better about not loosing tools:
![Image]()
And here's the stubby on the nut so I could turn it:
![Image]()
Clamp 3:
![Image]()
And the wrench on clamp 3:
![Image]()
The upper 3 were realatively easy, but I still had to bend the hoses to get the socket on the nut. Clamp 4:
![Image]()
Clamp 5:
![Image]()
Clamp 6 - back to the stubby:
![Image]()
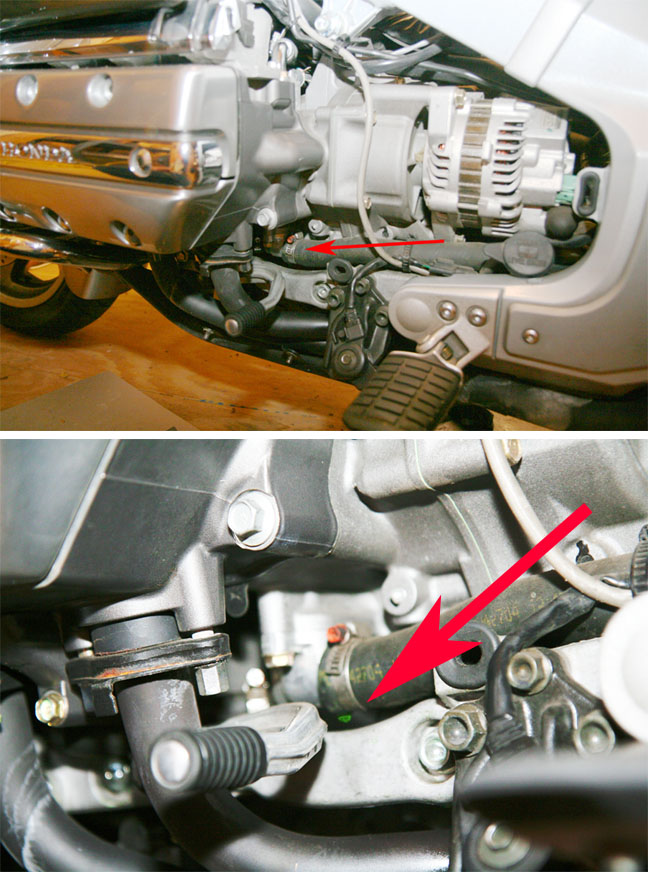
I then made it a point to find as many other coolant hose clamps that I could find exposed on the bike and tighten them. This was the only one I found with evidence of leaking... and I hope that was the only leak. This one is on the left side of the bike just inside the gear shifter. I had to remove the exhaust guard to get to it.
![Image]()
Don't forget to re-connect that plug!
I hope this helps!
Good luck!! 8)
I wrestled with the 6 coolant hose clamps under the gas tank and I finally got them all tightened. Ironically, I didn't see any evidence that coolant was leaking from any of these clamps, but I tightened them a bit anyway, being conscious not to over tighten them, which could be worse than them being loose. It's a tricky job, but it can be done.
I didn't want to loosen the clamps and spin them like Fred did... I figured if I could get to them to loosen them, I might as well tighten them on the spot and not have to worry about the clamps rubbing other stuff. I read a post this morning by Blind Yak, and he did the same thing I did for the most part:
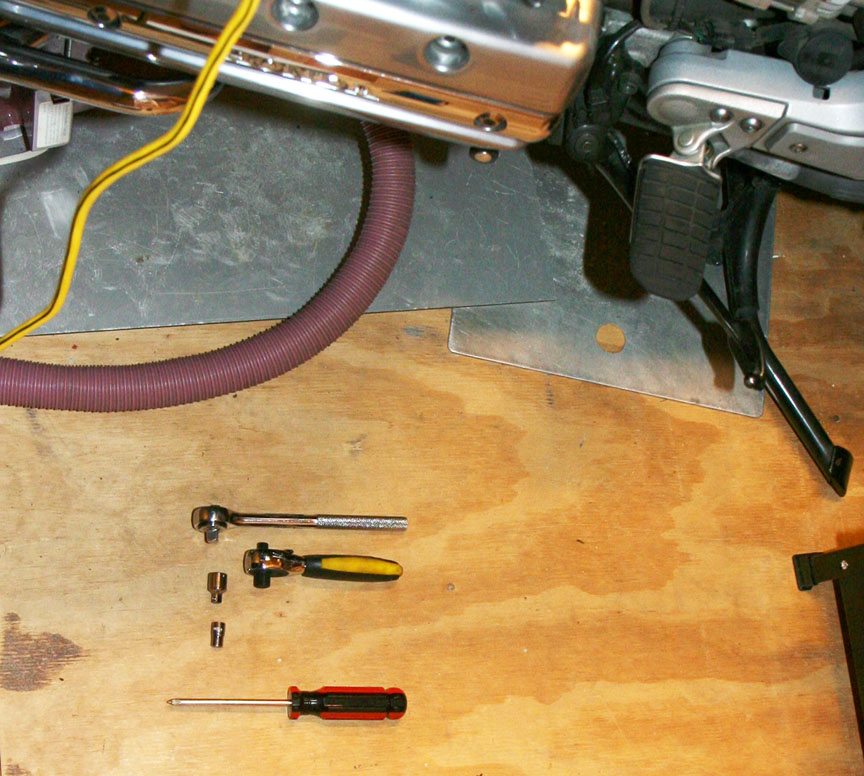
I too used a 1/4" ratchet... a short stubby one for the lower clamps and a regular one for the uppers. It's a 6mm socket for all the nuts. Clamp screws that are easily accessible can be tightened with a phillips head screw driver. I used a 1/2" to 1/4" adapter on my stubby to give it the bit of extra length that was needed to reach under some of the hoses. That caused the potential for dropping small tool parts into the HONDA HOLE, so I rigged a shop rag under my workspace as a drop cloth, as you'll see in some of the pics below. Here's the tools:Blind Yak said:
And here's the hose clamps. I numbered them in the order I did them and for purposes of these photos.
Here's photo's of tightening each clamp so you can see the orientation of the wrench in that tight space. I disconnected a plug that's in there so I could get more "swing" on my ratchet. I don't know what the plug is for, but you'll see it in the pics.
The real secret behind this job is "manhandling" the hoses. I found that as they warmed up from me fighting with them for a while that they became more flexible. Don't be afraind to bend them and push them out of your way to get your wrench on the nuts. There's a thick wire harness in there too that you have to move around.
Clamp 1 - This one is easy:
Clamp 2 - For this one I had to jam my stubby ratchet in under some hoses, and I didn't want the socket or socket extender to drop off into the black hole, so I worked a shop rag in there. Then you can "feel" where the clamp nut is, and I grabbed the rag at the nut with a pair of needle nose pliars and cut a small hole in the rag with scissors. I then exposed the nut through the hole and felt alot better about not loosing tools:
And here's the stubby on the nut so I could turn it:
Clamp 3:
And the wrench on clamp 3:
The upper 3 were realatively easy, but I still had to bend the hoses to get the socket on the nut. Clamp 4:
Clamp 5:
Clamp 6 - back to the stubby:

I then made it a point to find as many other coolant hose clamps that I could find exposed on the bike and tighten them. This was the only one I found with evidence of leaking... and I hope that was the only leak. This one is on the left side of the bike just inside the gear shifter. I had to remove the exhaust guard to get to it.
Don't forget to re-connect that plug!
I hope this helps!
Good luck!! 8)